
ReservedFlashlightSlot
Отдельный слот для фонарика справа на экране, который при желании можно купить. Клавишей [F] фонарик включается в любой момент.


 Мод для Lethal Company
от LethalAPI
Полноценный API моддинга для всего, что связано с терминалом на борту. Включая пользовательские команды, взаимодействия, капитальные ремонты терминалов, условные переопределения команд и многое другое.
LethalAPI Terminal — мод для Lethal Company (Летал Компани) от автора LethalAPI. Полноценный API моддинга для всего, что связано с терминалом на борту. Включая пользовательские команды, взаимодействия, капитальные ремонты терминалов, условные переопределения команд и многое другое.
Его скачали 364 тыс. раз: это 453-е место среди модов Lethal Company в нашем каталоге, редкость — «обычный» (нижняя половина по скачиваниям). Мод давно не обновлялся — проверьте совместимость с текущей версией игры, актуальная версия — 1.0.1.
Для работы ему нужны: BepInExPack.
Текст автора на языке оригинала
Terminal Commands API for the Lethal Company Modding API
This mod makes some changes to how the terminal works, that isn't fully integral to custom commands.
These changes are as such:
Terminal commands are declared as annotated methods. E.g.,
[TerminalCommand("Ping"), CommandInfo("Test command")]
public string PingCommand()
{
    return "Pong!";
}
All terminal commands are annotated with the TerminalCommand Attribute, and optionally, the CommandInfo Attribute.
The CommandInfo attribute attaches command metadata and enrolls the command to be displayed in the help command.
You can also attach access control attributes, e.g., AllowedCaller to specify who can execute a command and when. More on this later.
All commands have to be registered to this library. Registering commands can be done through the CommandRegistry API. E.g.,
private TerminalModRegistry Commands;

public void Awake()
{
  Commands = TerminalRegistry.CreateModRegistry();
  Commands.RegisterFrom(this); // Register commands from the plugin class
  Commands.RegisterFrom(AnotherObject); // Register commands from another instance
  Commands.RegisterFrom(); // Activate and register commands from a type
}
You can also deregister commands by calling TerminalModRegistry.Deregister().
All arguments are injected into the method, either parsed from the user input, or sourced from the execution context. E.g.,
[TerminalCommand("RickRoll")]
public string RickRollCommand(Terminal caller, [RemainingText] string text)
{
  // Echoes the user's message back to them, and rickrolls them
  caller.PlayVideoFile(RickrollVideoPath);
  return text;
}

[TerminalCommand("Multiply")]
public int MultiplyCommand(int a, int b)
{
  return a * b;
}
Notice how commands don't need to return a string but can return anything. You can return your own TerminalNode, which is how the game itself handles command responses, or you can return anything, and it will be converted to a string.
Additionally, if you return null, execution will fall through to the next valid command handler. More on this later.
You can even parse some extra types such as PlayerControllerB, which will be parsed from Steam64ID, or player name. Argument injection is a useful tool to reduce boilerplate and create command overloads.
You can inject as many arguments as you want, and the method will only be executed when all specified arguments can be provided, either from context, or parsed from user input. Generally, you will never need to manually parse basic arguments yourself. However, if you do want to handle argument parsing yourself, you can inject either string[] or ArgumentStream.
When a player runs a command, the first step in this process is selecting candidate commands. All commands registered with the same command name, and matching signatures can be evaluated. These commands with matching/compatible signatures will be executed in descending order of priority, and then argument count.
So a command with more arguments will take priority over a command with less arguments. However all these arguments still must be valid and parsed from user input. Meaning you can create command patterns such as:
[TerminalCommand("BuyArtefact")]
public string BuyArtefactCommand()
{
  return $"Available Artefacts:\n"
    + FormatAvailableArtefacts();
}

[TerminalCommand("BuyArtefact")]
public string BuyArtefactCommand(string artefactName)
{
  if(TryBuyArtefact(artefactName))
    return "Artefact purchased!";

  return "Insufficient funds";
}
Here, running BuyArtefact will execute the first handler, but running BuyArtefact gun will execute the second. This is because the 2nd one has more arguments, so it will take priority when the user's input matches the commands signature.
Additionally, the 2nd command could yield execution to the first, by returning null. Since commands are executed in order, if one command returns null, command handling will be passed ot the next handler.
This means you can conditionally override other commands, including commands built-in to the game. To aide with this, you can also set the command priority using the CommandPriority attribute, to make it execute before another command regardless of argument count.
You can also decorate commands with the AllowedCaller attribute, to set what players can execute it, e.g., host-only. For commands registered to be shown in the help command results, commands that a player doesn't have access to won't be shown. E.g.,
[TerminalCommand("Kill")]
public string KillPlayerCommand()
{
  return "Usage: Kill [Player]\n" +
    "You must be the host to use this command";
}

[TerminalCommand("Kill"), AllowedCaller(AllowedCaller.Host)]
[CommandInfo("Kills the target player", "[Player]")]
public string KillPlayerCommand(PlayerControllerB player)
{
  if (StartOfRound.Instance == null)
    return "Game not started";

  player.KillPlayer(Vector3.up);
  return $"Killed {player.playerUsername}";
}
The first command can be executed by anyone, but still won't show in the help command, since it doesn't have the CommandInfo at
Описание длинное — здесь его начало. Читать целиком на странице автора
В r2modman ставится автоматически
Файл скачивается с официального сервера Thunderstore, без перезаливов и сторонних установщиков
Подробная инструкция для Lethal CompanyВставьте значок в описание на Thunderstore, в README или в Discord — русскоязычные игроки сразу попадут на страницу с переводом и инструкцией.

[](https://modka.app/lethal-company/lethalapi-lethalapi-terminal/)<a href="https://modka.app/lethal-company/lethalapi-lethalapi-terminal/"><img src="https://modka.app/badge.png" alt="Описание на русском — Модка" height="44"></a>[url=https://modka.app/lethal-company/lethalapi-lethalapi-terminal/]Описание на русском — Модка[/url]Скачайте менеджер модов r2modman (или Gale) и выберите в нём игру Lethal Company. Создайте профиль — так моды не смешаются с чистой версией игры. Найдите «LethalAPI Terminal» во вкладке Online и нажмите Download — BepInEx и все зависимости подтянутся сами. Нажмите «Start modded» — игра запустится с модами. Для мультиплеера всем игрокам нужен одинаковый набор модов: в r2modman профиль можно экспортировать кодом и отправить друзьям.
Файл скачивается с официального сервера Thunderstore, куда его загрузил LethalAPI. Мы не перезаливаем и не изменяем моды.
Автор не указал, клиентский это мод или серверный. Безопаснее, чтобы одинаковый набор модов был у всех игроков в лобби: проще всего поделиться профилем r2modman.
Установите вместе с ним: BepInExPack. В менеджере модов зависимости подтягиваются автоматически.
9 января 2024, актуальная версия — 1.0.1. Это больше года назад: перед установкой проверьте, работает ли мод на текущей версии игры.
Отдельный слот для фонарика справа на экране, который при желании можно купить. Клавишей [F] фонарик включается в любой момент.

Добавляет в игру опасного нового монстра. Сможете ли вы отличить настоящее от подделки или станете его добычей?
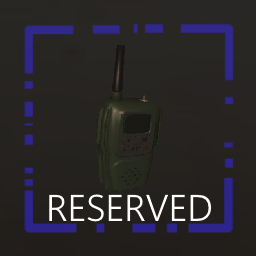
Отдельный слот для рации справа на экране, который при желании можно купить. Клавишей [X] можно в любой момент включить рацию и говорить в неё.

Мод с множеством улучшений, которые покупаются в терминале через интерактивное приложение. Почти все улучшения можно настроить под свой вкус.

Заменяет стрекот Hoarding Bug на звук yippee-tbh.

Добавляет причину смерти в отчёт об эффективности, теперь ещё и с API для модов.