
Spookbox
Добавляет глупый бумбокс (The SpöökboxTM) в магазин, чтобы вы могли танцевать под любую мелодию, которую вы хотите


 Мод для Content Warning
от Xerren
Выставляет простой в использовании API для добавления пользовательских предметов в игровой магазин.
ShopAPI — мод для Content Warning (Контент Варнинг) от автора Xerren. Выставляет простой в использовании API для добавления пользовательских предметов в игровой магазин.
Его скачали 67,1 тыс. раз: это 107-е место среди модов Content Warning в нашем каталоге, редкость — «обычный» (нижняя половина по скачиваниям). Мод обновлялся в течение года, актуальная версия — 1.3.0.
Для работы ему нужны: BepInExPack.
Текст автора на языке оригинала
Content Warning Shop API
Exposes an easy-to-use API to add custom items to the in-game shop in Content Warning.
See the mod's GitHub repository for detailed setup instructions and usage information.
ItemDataEntry types defined in your mod to interface with the game's built-in item synchroniser.SynchronisedMetadata class.DO NOT bundle the mod's DLL with your own. Ensure that no ShopAPI.dll is included with your build.
Depending on your publishing target, you should instead require it as a dependency on your publishing platform:
When publishing on the Steam Workshop, add this Workshop Item as your item's dependency via the "Add/Remove Required Items" option (on your mod's page right hand side panel).
Steam will ensure that the dependency will load before your mod when the game is launched.
When building a BepInEx plugin, add this mod as a dependency to your plugin's main file:
[BepInDependency(ShopApiPlugin.MOD_GUID)]
public class YourCustomPlugin : BaseUnityPlugin
{
    // ...
}
If a specific version is needed, pass ShopApiPlugin.MOD_VER after the GUID.
When publishing on Thunderstore, add the mod's Dependency String to the manifest.json file, so mod managers can automatically fetch it.
Once added as a reference to your project, all classes are available under the ContentWarningShop namespace.
Ideally Items should be preconfigured and packed into an 1, but you can also construct them at runtime if its easier.
Custom Items should have their persistentID, price, purchasable, Category, and icon properties set to work.
If you would like your item to have a chance to be randomly spawned in the Old World like other items, set spawnable to true, and itemType to Item.ItemType.Tool.
Items can be registered via the RegisterItem method:
//using ContentWarningShop;

var yourCustomItem = yourAssetBundle.LoadAsset("yourItem");

Shop.RegisterItem(yourCustomItem);
Shop.RegisterCustomDataEntries();
NOTE: Item prices are automatically synchronised between players on lobby join. The price set by the lobby's host will be used for the entire lobby.
You can check if a custom item has been already registered via the IsItemRegistered method. The list of all registered custom items is also available via the CustomItems property.
If your item uses custom ItemDataEntry types, call the RegisterCustomDataEntries method to fetch and register all custom types defined in your assembly. This will let the game automatically synchronise the items' custom state between players. (See compatibility if you run into issues) It is enough call this method once per assembly / mod.
If you need to update an item's price at any point after a lobby has been started, use the UpdateItemPrice method:
var success = Shop.UpdateItemPrice(yourCustomItem, price);This will re-synchronise the item's price to every player. Note that only the lobby's host can update an item's price, so the method returns a boolean indicating if it was successful (if the local player had permissions).
The SynchronisedMetadata class allows arbitrary settings to be synchronised between players through the use of Steam Lobby Metadata keys. Simply create a new instance with a specific type and key and it will be automatically updated whenever the key's value is changed.
TIP: Consider prepending your mod's GUID to the key to ensure it won't accidentally collide with a different mod.
For example to synchronise a simple boolean setting with false as the initial value:
public static readonly SynchronisedMetadata ExampleSetting = new("ExampleSetting", false);An instance bound to a key will remain valid even if the player changes lobbies, so they can be kept for the entire run-time of the game.
To update a setting's value, call SetValue(T value). Only the lobby's host may update the value of a key, so the method returns a boolean indicating if the set was allowed. If it was rejected, the instance's value isn't updated. Use CanSet method to check if the current player has permission to update the setting.
The ValueChanged event will be raised with the new (current) value when a key is updated either locally or remotely.
IMPORTANT: Values are converted to strings when passed on to the steam lobby, so make sure your type can be cast to string and back.
NOTE: When not currently in a lobby, setting the value is permitted as if the current player was the host, and the ValueChanged event will still be raised.
In the scenario that you have separate player and lobby settings, and you want to apply the local player's settings when they host
Описание длинное — здесь его начало. Читать целиком на странице автора
В r2modman ставится автоматически
1 в каталоге
Добавляет глупый бумбокс (The SpöökboxTM) в магазин, чтобы вы могли танцевать под любую мелодию, которую вы хотите
Файл скачивается с официального сервера Thunderstore, без перезаливов и сторонних установщиков
Подробная инструкция для Content WarningВставьте значок в описание на Thunderstore, в README или в Discord — русскоязычные игроки сразу попадут на страницу с переводом и инструкцией.

[](https://modka.app/content-warning/xerren-shopapi/)<a href="https://modka.app/content-warning/xerren-shopapi/"><img src="https://modka.app/badge.png" alt="Описание на русском — Модка" height="44"></a>[url=https://modka.app/content-warning/xerren-shopapi/]Описание на русском — Модка[/url]Скачайте менеджер модов r2modman (или Gale) и выберите в нём игру Content Warning. Создайте профиль — так моды не смешаются с чистой версией игры. Найдите «ShopAPI» во вкладке Online и нажмите Download — BepInEx и все зависимости подтянутся сами. Нажмите «Start modded» — игра запустится с модами. Для мультиплеера всем игрокам нужен одинаковый набор модов: в r2modman профиль можно экспортировать кодом и отправить друзьям.
Файл скачивается с официального сервера Thunderstore, куда его загрузил Xerren. Мы не перезаливаем и не изменяем моды.
Автор не указал, клиентский это мод или серверный. Безопаснее, чтобы одинаковый набор модов был у всех игроков в лобби: проще всего поделиться профилем r2modman.
Установите вместе с ним: BepInExPack. В менеджере модов зависимости подтягиваются автоматически.
22 ноября 2025, актуальная версия — 1.3.0. Дата берётся с официальной страницы мода при каждом обновлении каталога.

Настройки для гаджетов

Vanilla + Modpack, который включает в себя все моды, которые вам могут понадобиться

Этот модуль дает вам много хороших модов для большего количества веселого контента!

Настройка разрешения видеорегистратора
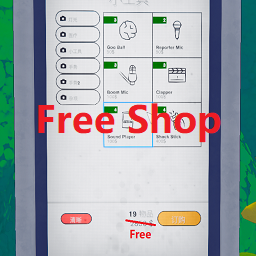
Позволяет покупать товары бесплатно.

Vanilla + Modpack, Это делает ваш опыт лучше! - Настроен и готов играть!